Mplab Ide and C18 Compiler configuration

PIC Tutorial, Mplab IDE - C18 compiler tool
PIC18F4550 | Looking the data sheet | Ports
PIC18F4550 Programming method 1 Project Blink led
PIC18F4550 Programming Method 2 Blink led
PIC18F4550 Blink LED 20MHZ Oscillator | XC8
Mplab X IDE and XC8 compiler Blink LED
PIC18F2550 programming: Blink LED | XC8
Configuring MPLAB and C18 Compiler,Setting up your first Project
Mplab Ide Installation
C18 Compiler Toolsuite Inslallation
Toolsuite Settings and creating a new project
Library and Path settings
Introduction
Configuring MPLAB with C18 compiler and setting your first project requires some basic set of things which need to be kept in mind all the time while you carry on to avoid un necessary pain. In my previous pic18f4550 programming post we got a quick preliminary description about Programming a Microcontroller. I am assuming that you have already downloaded the tools from, microchip (MPLAB IDE and C18) Compiler from the links provided from the previous post.
If installation for Mplab and C18 Compiler went well for you then, you can quickly skip this part of tutorial and go on the next part with for coding your pic18f4550 microcontroller. PIC18F4550 Blinking LED Method - 1.
Next stage would be to install the weapons, (tools) that we downloaded in our previous post for the war to be won. Snapshot below describes the steps of installation, Configuration of C18 Compiler, creating project and Setting up compiler, library and directories on windows XP OS. Installation and settings won’t be much of a different taste for other Windows OS as well.
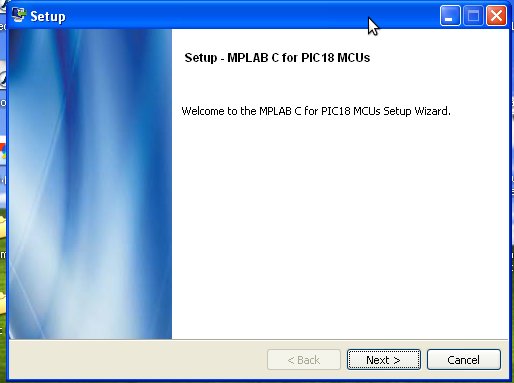
First Install the MPLAB IDE from the setup file you downloaded.
All the system files for MPLAB IDE would be installed in
C:\Program Files\Microchip\MPLAB IDE
All the core files are located in
C:\Program Files\Microchip\MPLAB IDE\Core
Incase if in future you loose the shortcut then you can start mplab from
C:\Program Files\Microchip\MPLAB IDE\Core\MPLAB.exe
C18 Compiler Toolsuite Installation
All right that enough of MPLAB IDE. Let’s gets go on to C18 compiler now. The lite version of c18 Compiler that we are installing here is version v3.41.
Next you have to run the C18 Compiler setup for installation. The C18 compiler will detect the MPLAB and will install accordingly.
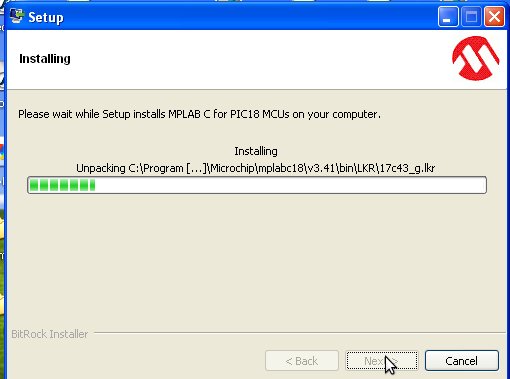
After Installation of C18 Compiler, all the necessary compiler files, Headers, Linker and few Example coding will be installed in following directory.
C:\Program Files\Microchip\mplabc18
You can review short example programs
C:\Program Files\Microchip\mplabc18\v3.41\example
Microchip always documents its releases very nicely. Quick getting started documents can be found in
C:\Program Files\Microchip\mplabc18\v3.41\doc\MPLAB-C18-Getting-Started_51295f.pdf
ToolSuite Settings and Creating a New Project
Project wizard
Microchip C18 Toolsuite
Adding files to project
After installation of Mplab and C18, next step is to create a new project from Project Wizard. All the coding would be handled as individual projects which would contain various the blocks of code interconnected.
For demo purpose we are going to create a Dummy project to understand the project setting. First create a new folder in your desktop or on your desired location manually. In our tutorial I have created a folder on Desktop “Project1”. All the project files will be stored here; don’t forget the location where you created your project folder.
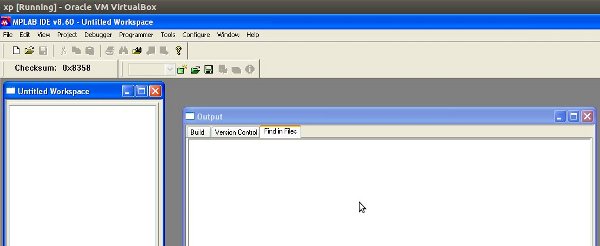
So First start MPLAB IDE, which would start blank as an “Untitled Workspace”.
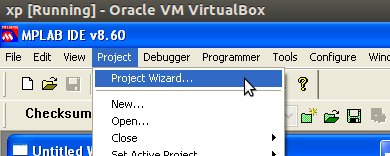
Project Wizard
Create a new project by proceeding through project wizard from top file menus that would help you to setup the setting for your first new project. Project wizard would give you options to select your microcontroller which you intent to code and also it will load the necessary tool suite that you need for project.
Project Wizard
Select the microcontroller from the drop down list menu, which in our case is PIC18F4550.

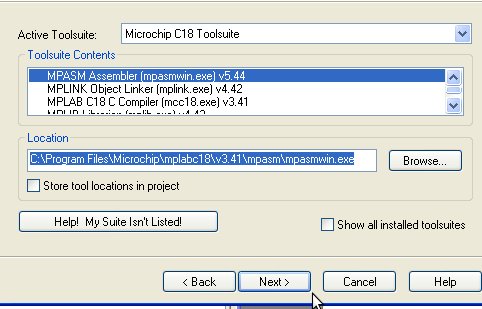
ToolSuite Selection
Next step would be to select the Toolsuite.
In our case we are going to use C18 Compiler Toolsuite, so while creating the project from project wizard when it prompts, select C18 Toolsuite from the top drop down menu.
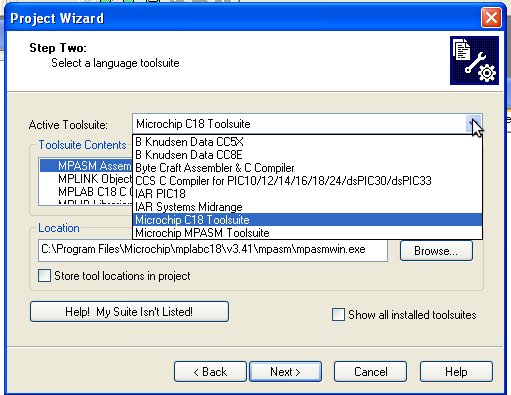
From Drop down menu select Microchip C18 Toolsuite
Most of the time the default would be Microchip C18 Toolsuite if you haven’t installed any other Tool suite.
Select the Microchip C18 Toolsuite from Active Tool suite drop down menu and go on to next settings with defaults.
Next step is to give a name to your project, hit browse and Navigate to the location where you created a folder in the beginning of this session. The folder which was created in the beginning was named as project1 for this tutorial. Navigate to the folder that you created.

Navigate inside the folder and then name the new Project. And then click next.
In the next screen Mplab would prompt you to add some files to your project. This prompt would help you to add already coded files. Since we don’t have anything yet coded for our pic18f4550 so proceed with next button leaving things untouched.
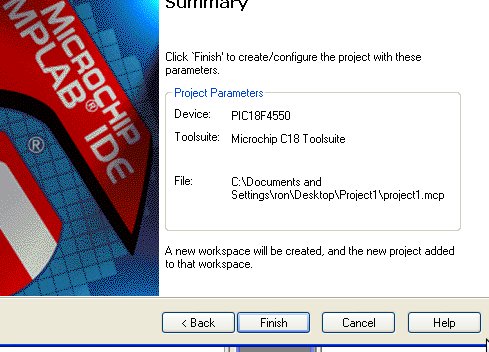
When everything is done mplab would display Project Summary with all project parameters such as Device name, Toolsuite and location of the project. Hit finish.
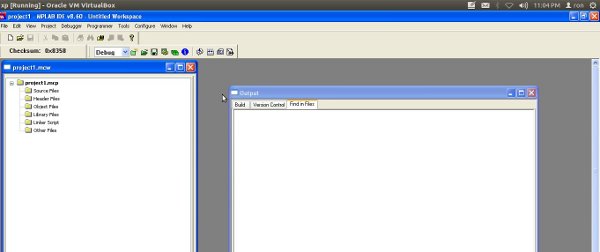
Your project settings are now ready. Created project can be viewed in the same folder where you saved your project few seconds ago. The main project file would be yourprojectname.mcp ( the name which you gave to the project while creating the project inside the folder where you saved ). You can always launch the entire project with your project name. For this tutorial its been named as project1.mcp inside the main project folder project1.
-
Project1 (project Folder)
- Project1.mcp (Project name)
The Project which is created now would be blank without any coding.
Adding a new C File
Now since we have created a project, now we have to add C files for writing our code.
Create a new file by either clicking on File > New or click on New File icon.

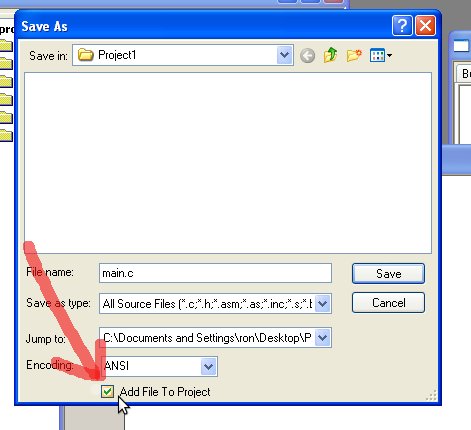
That would create a new untitled file. Write some dummy string and then hit save. Name the file while saving it. In our case we would name it as main.c.
NOTE:* While saving the file, remember to check the box. “Add this file to project” or the file saved will not be added to the project workspace and the main.c will be missing from project file explorer.
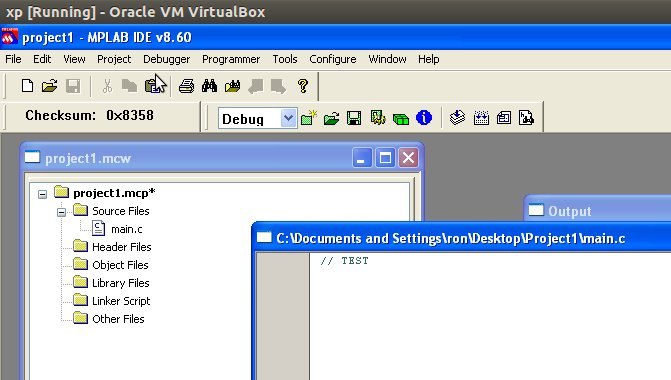
The new added C file would be enlisted in the project explorer Under “Source Files”. Now we have successfully added a C file for writing the codes.
You can review the build (Compile) setting for your Project under the menu
Project > Built Options > Project
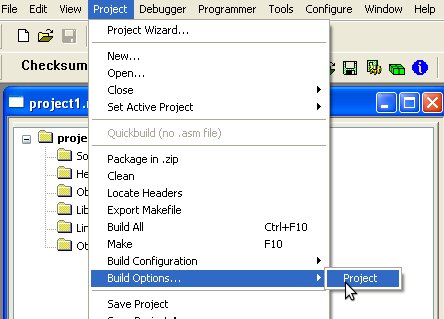
Built options
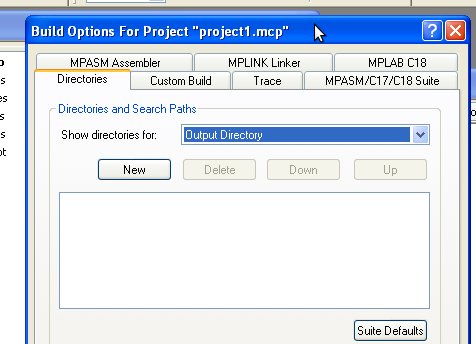
By default when the Microchip C18 Toolsuite was chosen from project wizard, it added the directory paths for the links and library setting for the project, which includes the links to the linker files for linking and other necessary libraries. Just in case if the library settings are not set then you can review the setting under the Directory Search Paths.
From drop down menu under the Directories select Library Search Path.
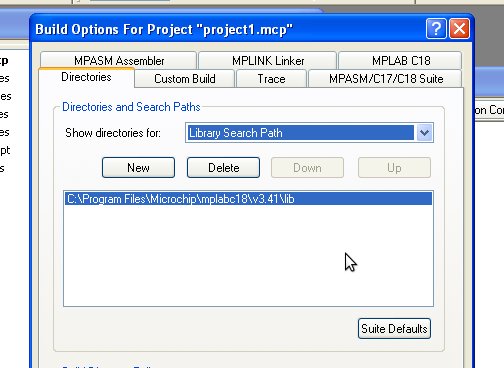
After selecting the Library Search Path, if you find it empty then you can add the path manually.
C:\Program Files\Microchip\mplabc18\v3.41\lib
Output Path Setting
By default if you don ’t choose an output folder then all files created during the compilation of the program would be directly dumped into the main project folder (Project1 folder) where you created the project. That would make things looks messy after you compile, and you would find some extra files that compiler generated during compilation.
To avoid that it’s recommended to add a separate output folder. So that compiler would dump all the files into the Output folder including your .hex file which is your final outcome before burning it into the microcontroller.
- Create a new Folder inside the main Project folder and name it as output.
- Open the Directory Setting in the project Built Option
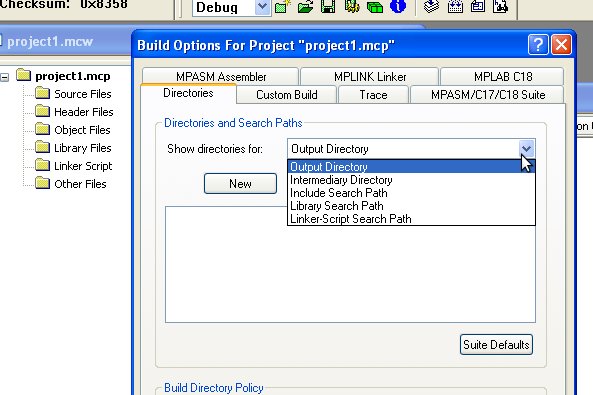
- Select the option from drop down as “Output Directory”

- Hit the browse icon and locate the main project1 folder and then select the folder you just created with name “Output” and then apply settings.
Henceforth whenever you would compile any project all the runtime files and output hex files would be dumped in the output folder. That would make life easy in future.
Hence now we are completely set with MPLAB IDE, compiler and Project settings .. So lets carry on with our first setting on real time coding with hardware c.
Thanks for Reading
Ron
