Configure winpic800 with JDM Programmer
How to Configure winpic800 with JDM programmer
(winpic800 config with JDM programmer)
CONFIGURATION
Author: Rakesh Mondal
Configure winpic800 with JDM Programmer
In my last post we made a JDM programmer ( HARDWARE) , now I am going to show about configuring the JDM PROGRAMMER hardware with winpic800 to program the microcontroller in the JDM programmer.
Download WINPIC800 from google and install.After Installation is completed connect your JDM Programmer on your serial ( port DB-9 ) then start the software WINPIC800 .
Requirement : WINPIC800 , DEMO HEX code ( here we are going to upload a small hex. Code that will allow you to bootload and detect your pic18f4550 for installation of PIC18F4550 Driver , this code wont let you control your USB DEMO INTERFACE BOARD . I will provide that code in my coming posts . )
.
Note: Do not forget to set the oscillator value in the winpic800 or after programming the chip won't respond, for our pic18f4550 USB board set the winpic800 to 20mhz from settings.

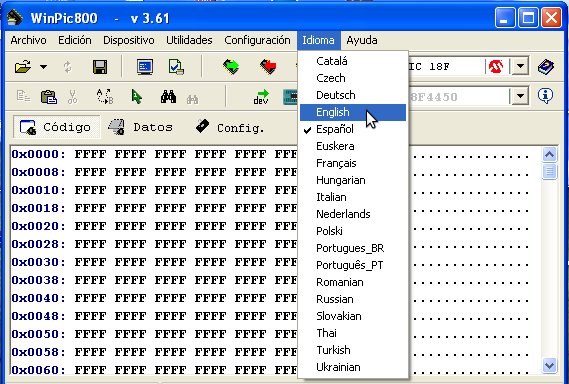
1- Connect your JDM serial programmer and then start WINPIC800 , set the language to English.
2- Select the PIC type ( for our USB Demo Interface we will select " PIC18F ")

3- Select the microcontroller ( For our board we select " 18f4550 ")

4- Click On Settings > Hardware

5- Select JDM Programmer
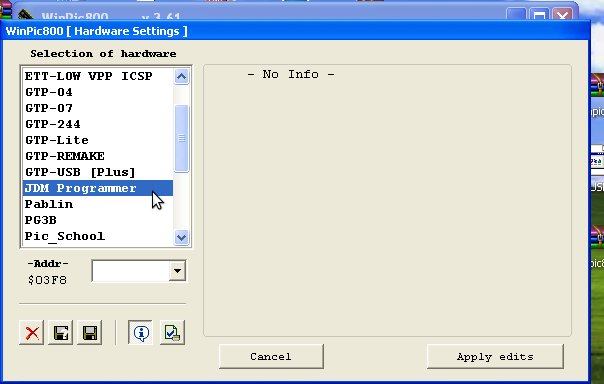
6- Click On the address ( -addr- ) which will be empty initially and then drop down menu, select the COM option enlisted in the list. If nothing is Displayed or its empty after you drop down -addr- then there is a fault in your JDM HARDWARE or may be the JDM is not connected properly to your PC. Reconnect the hardware then restart Winpic 800 again and repeat over.

Then Click save changes and continue
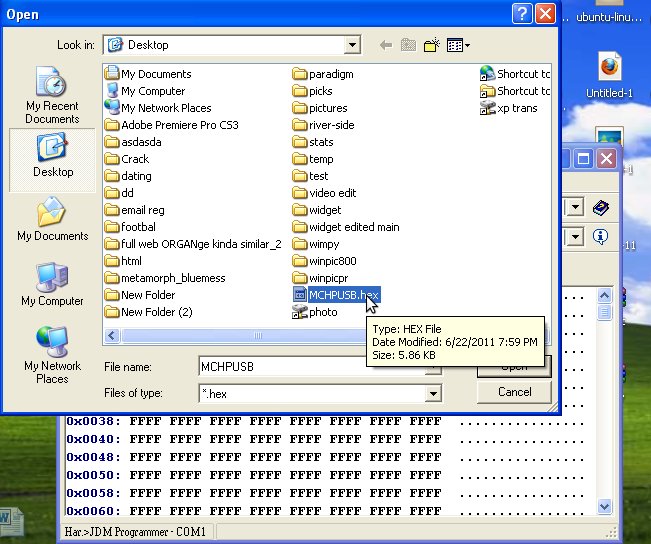
7- Load the .hex file in the winpic800 that you wish to load in the microcontroller from the menu.

Set the Oscillator from Software settings*
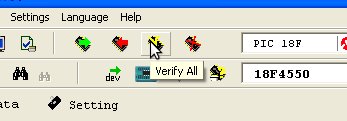
8- Verify the Device and microcontroller to see if the device and the microcontroller is detected by wipic
9- Hit the read and then Program all button , and if everything goes right without error or any red, then you are done.

Now lets carry on with next section of this project.
NEXT STEP >> How to Install Driver's for USB INTERFACE BOARD
Thanks for reading
Rakesh Mondal
ron
